Key Parts of a Router You Must Know in 2025
Disclosure: This post may contain affiliate links from online retailers, including Amazon. If you click a link and buy tools or supplies, I may earn a small commission—at no extra cost to you. This allows me to provide you free helpful content, and I genuinely appreciate your support🤝 Learn more
Ever picked up a router and thought, “What does this part even do?” Yeah, I’ve been there.
When I first used one, it felt like handling a spaceship—buttons, knobs, weird noises. I had no clue what made the bit spin or how deep it was cutting. But once I learned the parts of a router, everything got easier—cleaner cuts, better control, and a lot fewer mistakes.
In this guide, I’ll break down each major component in plain terms so you actually understand how your router works—and how to use it like a pro, not just hope for the best.
Build Smarter – For FREE!
Join the Tekton Crew and grab 3 FREE Workbench Build Plans with 3D models—plus exclusive DIY tips, tool reviews, and more!
Why Knowing the Parts of a Router Tool Matters
You can have the most powerful router in the world… but if you don’t know how the parts of a router work, it’s basically a glorified paperweight.

When I first got into woodworking, I treated my router like some mysterious magic wand. I’d clamp down a board, fire it up, and pray the cut came out right.
Spoiler: it usually didn’t. Once I started actually learning the parts of a router, things changed fast. I wasn’t just reacting—I was controlling the cut.
Understanding the base, the motor, the collet—all of it—makes you way more confident. It also keeps you safer. I’ve seen bits shoot across the shop, burns from going too deep too fast, and cracked collets from being over-tightened. All avoidable if you know the parts of a router and how they work.
Plus, when something feels off—like a burning smell or a weird vibration—you’ll know where to look first. No more guessing. Whether you’re adjusting depth for a dado or swapping out a bit for edge profiling, knowing your router’s anatomy gives you an edge most beginners skip over.
This isn’t just tool knowledge—it’s craftsmanship. Learn your gear, the parts of a router and everything else starts clicking into place.
Router Base: Fixed vs Plunge
This confused the heck out of me at first. I thought a router was just… a router. Then I found out that the main parts of a router were the different base types, and that choosing the wrong one could totally mess up your cuts.

Here’s the deal: a fixed base router holds the bit at a set depth. Once it’s locked in, that’s your cutting depth. It’s great for edge work, roundovers, and general routing where the bit doesn’t need to move vertically during the cut. I love it for profile cuts and flush trimming—it just feels stable and easy to control.
But then you’ve got the plunge base. This one lets you lower the bit into the wood while it’s running. It’s perfect for cutting grooves, mortises, or stopped dados where you need to start in the middle of a board. It takes a little getting used to, but once you get the feel for it, it’s super versatile.
For most beginners, I recommend starting with a fixed base. It’s simpler, safer, and gives you good results while you build confidence. But if you’re planning to get into more advanced joinery or template routing, a combo kit with both bases is the way to go. That’s what I use now, and I switch between them all the time depending on the job.
Just don’t make the mistake I did early on—I tried to plunge with a fixed base. Yeah… not recommended.
Motor Housing and Speed Control

The motor is the heart of the router—and if you don’t respect it, it will let you know.
I remember using an old, single-speed router early on that had no soft start. The thing would kick like a mule the second you flipped it on. I nearly launched it off the bench more than once. These days, I won’t buy a router without a soft start and variable speed control. It’s a game changer.
The motor housing holds everything together—literally. Inside, you’ve got the actual motor (measured in amps or horsepower), the brushes(unless its brushless), the armature, and usually a speed control dial.
That little dial might seem like a minor detail, but it gives you full control over your cuts. Slower speeds are better for big bits or softer wood. Higher speeds work for small bits or detail work. And trust me, once you start hearing the whine of a bit spinning too fast for the cut, you’ll get why this matters.
One more thing—listen to your router. You’ll start to hear when something’s off. Too much bogging down? Speed might be too low.
Burn marks? Could be too fast or too deep. That’s how I started learning—not from manuals, but from the smell of scorched maple and a few ruined boards.
So yeah, power matters. But control? That’s what makes the difference between a hack job and clean, professional cuts.
Collet and Collet Nut
If the motor is the heart, the collet is the handshake—it’s what holds the router bit tight and says, “Let’s get to work.”

The collet is a small metal sleeve that grips the bit’s shaft. It fits inside the motor spindle and gets tightened down with a collet nut. Sounds simple enough, right? But if you don’t seat your bit correctly or tighten it properly, you’re asking for trouble. I’ve had bits slip mid-cut (scary), wobble like a bad tire, and one time I overtightened and cracked the collet. Lesson learned.
There are usually two common sizes: 1/4″ and 1/2″. The 1/2″ shanks are sturdier and vibrate less, especially with larger bits. I use 1/2″ whenever I can. But a lot of beginner bits come in 1/4″, so having both collets—or at least an adapter—is super helpful.
Here’s a tip: don’t jam the bit all the way in. Insert it most of the way, then pull it back out about 1/8″ before tightening. This keeps it from bottoming out in the collet, which can cause poor grip or damage the shaft.
And always, always double-check that nut before you flip the power. A loose bit at 20,000 RPM is no joke.
Router Bits and Bit Shaft

This is where all the cutting action takes place—and where things can go sideways fast if you’re not paying attention.
The router bit shaft is the part that slides into the collet, and it needs to match the collet size exactly (1/4″ or 1/2″). I’ve definitely tried to force a 1/4″ bit into a 1/2″ collet before and wondered why it felt weird. Don’t do that. It’s like putting bicycle tires on a truck—just doesn’t work.
Then you’ve got the router bits themselves. There are tons of shapes: straight, flush trim, roundover, dovetail, chamfer—you name it. Early on, I bought one of those cheap 24-bit kits online thinking I was set. Half the bits dulled out after a few cuts, and one literally chipped apart mid-project. Now I’d rather have 5 quality bits I use often than a drawer full of junk.
Here’s what matters most: keep your bits sharp and clean. Resin build-up and dull edges make the motor work harder and burn your wood. I use a small brass brush and router bit cleaner every few weeks. Also, store them right—don’t just toss ’em in a drawer where the edges bang together.
If you’re just starting out, I’d recommend a flush trim bit, a 1/4″ straight bit, and a roundover bit. You can do a surprising amount of work with just those three.
Bottom line—don’t cheap out here. Good bits last longer, cut cleaner, and keep your router from doing overtime.
Depth Adjustment Mechanism
If you’ve ever burned a board or blown through the bottom of a dado, you’ve probably met your depth adjustment the hard way.

The depth adjustment mechanism controls how deep your bit cuts into the wood—and even a 1/32″ change can make a big difference. Some routers have a macro adjustment knob for quick rough settings and a micro-adjust dial for fine-tuning. Both are useful, and honestly, once I got the hang of micro adjustments, my joinery improved big time.
For fixed-base routers, you usually unlock the motor, slide it to the desired depth, and lock it back down. On plunge bases, you can preset the depth stop or use a turret system with different steps. That turret system confused me at first—I kept routing too deep because I didn’t realize which stop it was sitting on.
Here’s a tip I wish I knew earlier: always sneak up on your final depth in multiple passes. Don’t try to hog out a full 1/2″ in one go—it’s hard on the bit, the router, and your hands. Plus, deep single passes are more likely to burn the wood or kick back.
Also, make sure to lock the adjustment in place. I’ve forgotten to lock it down before and mid-cut, the bit slowly slid deeper. That’s a heart-drop moment.
Get comfortable dialing it in, and your results will instantly look cleaner, more pro, and way less sketchy.
Handles and Grip Design
You’d think handles wouldn’t matter much… until you try routing with sweaty hands and a sketchy grip.

The handle design on a router affects everything—your control, comfort, and even how precise your cuts come out. There are different types of routers for different tasks and they come with different grip styles.
The classic standard is the two-handle style.

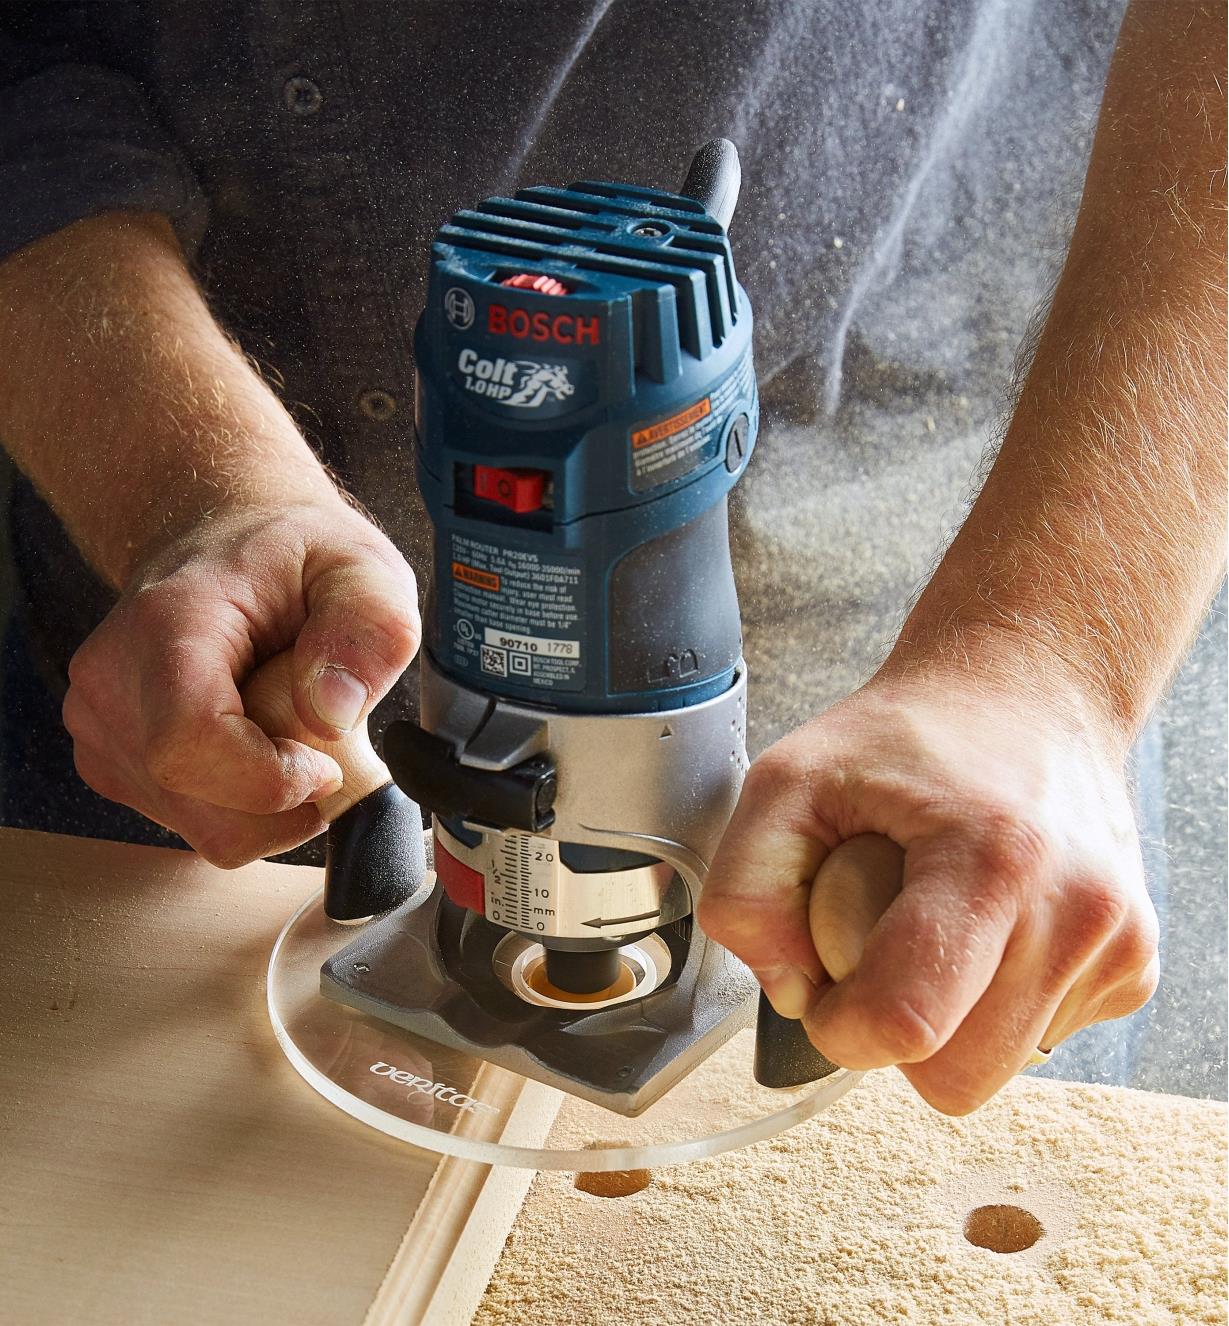
Then you have trim routers where the “grip” is the body itself and are contoured to fit well in one hand.

Another grip type is more brand specific but Festool routers have a unique grip style. Many carpenters swear by them because Festool is among the elite in tools for woodworking.
I prefer the classic two-handle style for medium to heavy duty work. It gives me a solid, balanced grip on both sides so I’m not muscling the tool through the wood but this is dependent upon what I am doing. Trim routers are great for edge routing and trimming and the one-handed design is perfect.
On plunge routers, some have a trigger in the handle, which takes a little getting used to. I remember the first time I used one—it startled me when the bit spun up before I had both hands steady. Now I make sure I’ve got the grip locked in before flipping the switch.
Also, don’t underestimate rubber overmolds or textured grips. When you’re doing long routing sessions—like cutting grooves across a bunch of panels—your hands will thank you for that extra comfort and control. I’ve had cheap routers slip just enough during a pass to mess up the whole edge. That’s a gut punch.
If your router doesn’t feel right in your hands, it’s not just annoying—it’s unsafe. Comfort equals control, and control equals cleaner cuts and less frustration.
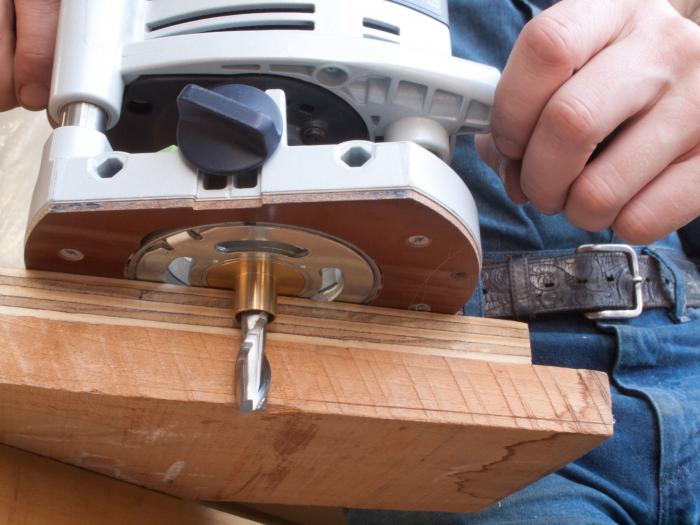
Router Base Plate and Guide Bushings

The base plate might seem like just a flat piece of plastic or metal, but it’s key to how your router glides, guides, and stays stable. A smooth, flat base helps your router move evenly across the workpiece. If it’s warped, scratched, or cheap plastic, you’ll feel every little snag—and your cuts will show it.

Then there’s the magic of guide bushings. These little rings sit inside the base plate and help follow patterns, templates, or jigs. I didn’t even know they existed when I first started. I was free-handing everything and wondering why my cuts never followed the line. Once I discovered bushings and template routing, it felt like cheating—in a good way.

You can also upgrade your base plate to a bigger one or a clear acrylic version for better visibility. I’ve made custom ones with holes for edge guides or dust collection, especially when doing repetitive work. It’s one of those mods that’s low effort but high impact.
Pro tip: if your router doesn’t come with guide bushings, you can usually buy an adapter plate or universal kit. I use mine for hinge mortising, sign-making, and all kinds of repetitive routing where precision matters.
So yeah, it’s just a flat plate… until you start seeing how much control and accuracy it brings to your work.
Parts of A Router Conclusion
A router might look like one simple tool, but once you understand how all the parts of a router work together? Game changer.
From the collet that locks in your bit, to the base that keeps it steady, every component plays a role. Learning the parts of a router gave me way more confidence in the shop—and helped me stop wasting good wood on bad cuts. If you’ve made it this far, you’re already way ahead of where I was starting out.
If this guide helped you get a better grip on how your router works, I’d love for you to join my email list. I send out helpful DIY tips, tool breakdowns, and beginner-friendly guides every week—stuff that’ll actually help you level up.
And if you liked this post on the parts of a router, be sure to check out my other posts:
- [How to Use a Router With These 11+ Steps (Ultimate Guide)]
- [17 Best Woodworking Tools for Beginners (Budget & Pro Picks!)]
- [DIY Woodworking for Beginners: Ultimate Guide to Getting Started In 2025]
Let’s keep building together.
Build Smarter – For FREE!
Join the Tekton Crew and grab 3 FREE Workbench Build Plans with 3D models—plus exclusive DIY tips, tool reviews, and more!
Parts of A Router FAQs
What are the main parts of a router tool?
The main parts of a router tool include the base (fixed or plunge), motor housing, collet and collet nut, router bit and shaft, depth adjustment mechanism, handles, and base plate. Each part plays a role in stability, control, and precision.
What does a router collet do?
The collet holds the router bit in place. When tightened with the collet nut, it clamps the bit shaft securely so it doesn’t slip during operation.
What’s the difference between a fixed and plunge base router?
A fixed base router has a set cutting depth and is ideal for edge work. A plunge base lets you lower the bit mid-cut, which is better for cutting grooves, mortises, or working inside a board.
How deep should you set a router bit?
It depends on the project, but in general, start with shallow passes and increase depth gradually. Avoid cutting more than 1/4″ deep in a single pass to prevent burning or damaging the bit.
Can you upgrade a router’s base plate?
Yes, many routers allow you to swap or upgrade the base plate. Larger or clear base plates improve visibility and control, and some support guide bushings for template routing.
Why is variable speed important on a router tool?
Different bits and materials require different speeds. Large bits need slower speeds, while small bits work best at higher speeds. Variable speed lets you fine-tune for cleaner, safer cuts.
How do I know if my router bit is dull?
If your bit burns wood, leaves rough edges, or requires extra force to cut, it’s probably dull. Clean your bits regularly and replace or sharpen them when performance drops.


